Use the handy set up guide below to get started with your H2O X5.
Assembling the Main Unit


Assembly Step 1
Assembly Step 2
Assembly Step 3
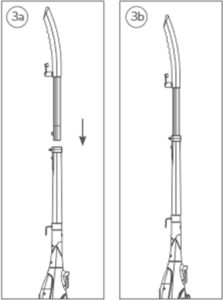
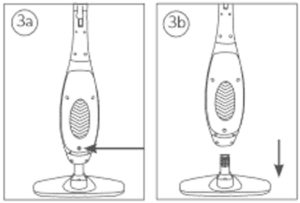
Assembly Step 4
Insert the power supply cord into the cord holder located at the top of the extension handle as illustrated in Fig. 4c and then insert power supply cord into the upper cord wrap as illustrated in Fig. 4d.
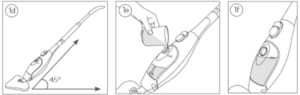
Assembly Step 5
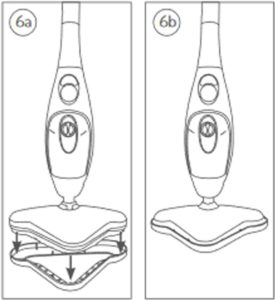
Assembly Step 6
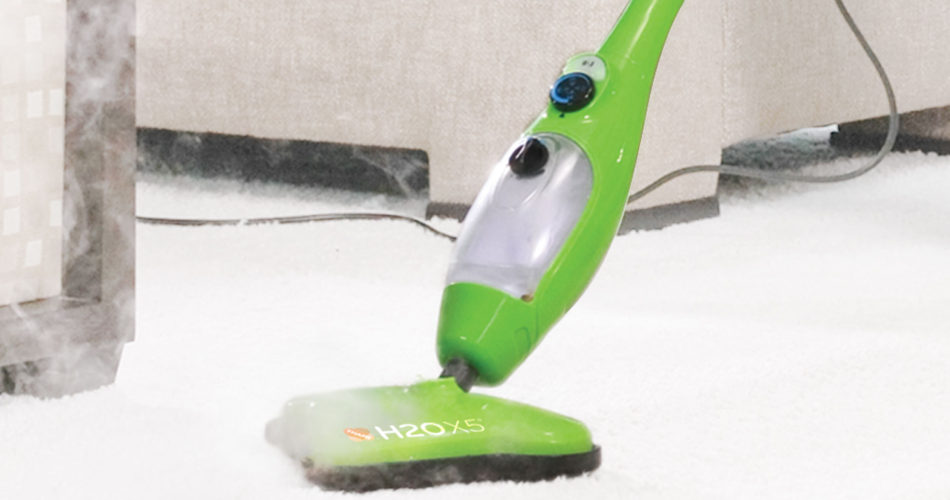
Using the H2O X5
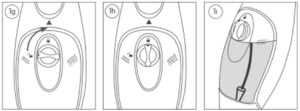
Filling The Water Tank 1
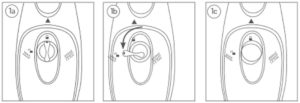
Make sure that the H2O X5® appliance is unplugged. Turn the water tank cap counter-clockwise approximately 90° to the “OPEN” position and remove the cap as illustrated in Figs. 1a, b and c.
Filling The Water Tank 2
Filling The Water Tank 3

Step 1
Never put cleaning detergents or scented products into the H2O X5® appliance, other then H2O™ scents. Use of any other detergents or scented products coud be unsafe and damage the unit.
Step 2
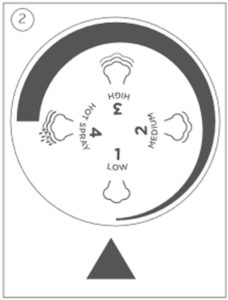
To avoid streaks and puddles select the appropriate setting for which you will be using the H2O X5® appliance. For less steam use settings 1 and 2, for more steam use settings 3 and 4.
1 – Low, 2 – Medium, 3 – High and 4 – Hot Spray
• 1 – Low and 2 – Medium setting: Ideal for cleaning all hard floors, such as linoleum, ceramic, marble, sealed hardwood, etc.
• 3 – High setting: Ideal for cleaning carpets and rugs.
• 4 – Hot spray setting: Ideal for cleaning bathrooms, kitchens, window sills, car wheels, etc.
You can change the steam regulator position and change the steam output while operating the H2O X5® appliance.
Step 3
When the ready-to-use indicator light turns green press the power switch ( O / I ) to the ON ( I ) position (lower position). The mop will start emitting steam.
To stop emitting steam turn OFF ( O ) the unit by pressing the power switch ( O / I ) again.
If the power switch ( O / I ) is pressed (lower position) prior to ready-to-use light indicator turning green, water from the previous use will not be heated and will be forced out by present steam and will cause puddling to occur. This may also happen if the power switch was left in the ON ( I ) position (lower position) from the previous use and the unit was disconnected by unplugging only.
Make sure to turn the unit OFF after each usage and then disconnect from the electrical outlet so the unit is in the OFF ( O ) position when used next time.
Step 4
Step 5
Assembling the Handheld Unit

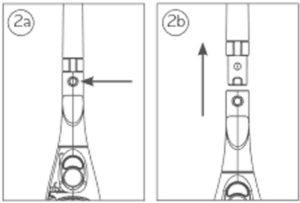
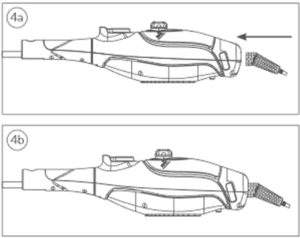
Step 1
Step 2
Step 3

Step 4
Make sure that the jet nozzle is securely locked in place before usage.
Step 5
• The round nylon brush is great for cleaning smooth hard surfaces, such as toilets, sinks, and kitchen counters, etc.
• The round brass brush is great for cleaning coarse or metal surfaces, such as brick floors, car wheels, metal doors, and metal frames, etc.
• Both brushes can also effectively clean the grease on pans, stoves and ovens in the kitchen. They can be used with soap or detergent to clean dirty areas. Soap or detergent can be sprayed directly onto the dirty area before steam is applied
Click Here to discover more on our blog or shop now to find the latest deal for the H2O X5 Steam Cleaner.